How to set up Event Goals in Google Analytics
July 16, 2021

2022 Update: At the end of this article we detail how to carry forward events created with GA3/Universal Analytics (RIP), into GA4.
Google Analytics is the most widely used tool to measure and analyze the performance, activity, and efficacy of a website. When you invest in your website, or marketing efforts that drive traffic to your website, it’s important to be able to measure your return on investment. Setting up Event Goals in Google Analytics will help you effectively measure your ROI.
At the beginning of a website redevelopment project, or the launch of a new digital marketing campaign, goals should be established to define what success would look like. Goals such as product sales, lead form submissions, contact form submissions, and newsletter signups are most common. When a user accomplishes one of these goals, that action is usually referred to as a conversion. Using Google Analytics to track these goals makes it easier to get a handle on the return on investment for your marketing efforts.
The Difference Between Events, Goals, and Event Goals in Google Analytics
The language and lingo used within Google Analytics can become confusing fast! Before we dive into how to set up Event Goals in Google Analytics, let’s first define what Event Goals are.
What is an Event in Google Analytics?
You can set up events within google analytics to track any action that a user takes. Examples of events include clicking a specific button or link, playing a video, or scrolling all the way to the bottom of a page.
Events like these can give you insight into website visitors’ activities that can help you make their path to conversion more clear. Events do not have to be tied to goals, and have their own reporting within Google Analytics.

What is a Goal in Google Analytics?
There are many types of goals that you can set up with Google Analytics. These goals can include duration, destination, and pages per browsing session. You can also tie custom events to goals, which is what we are interested in today.
Once you create goals you will have a reporting tab within Google Analytics to analyze goals. By tying a goal to a Google Ads conversion, you can really start to see how your Ads are performing, as well as breakdown the cost per conversion.

What is an Event Goal in Google Analytics?
An event goal is simply a goal that is triggered by an event. We first send an event to Google Analytics, then set up goals based on that event. Typically you would tie goals to something such as a contact form submission or a product purchase—something that you want to count as a conversion. Other more trivial events that you might be tracking, such as video interaction events, don’t need to be tied to goals.
With those definitions out of the way, let’s dive into learning how to set up event-based goals.
5 Steps To Setting Up Event Goals In Google Analytics
Step 1: Decide on a Goal
Decide what type of goal or conversion you want to keep track of. This could be a product purchase, a resource download, or a form submission.
In our example, we will keep track of successful contact form submissions.
Step 2: Define a Conversion
Define the user interaction that you want to count as a conversion. For the contact form submission example, we will count a successful submission as the conversion.
If you wanted to track a content download, the button click could be the interaction.
Step 3: Create the Event
Create the Google Analytics event based on the interaction.
There are two main ways to send Google Analytics an event beacon: Google Tag Manager, and by manually sending the event with javascript on your website. If the word javascript makes you uneasy, you should explore using Google Tag Manager, here is a good guide to get started with.
If you are familiar with editing your website code, you should consider using the javascript method. The documentation is great, and you just need to add a listener to wait for the user interaction (button click, form submit, etc.) to fire the function.
In either case, you will need to define three properties for every event: category, action, and label.
For our contact form event we will use:
- category=form
- action=submission
- label=contact-form
Later, we might add conversions to other forms on the site, and we can adjust the label accordingly. We could also track failed submissions by changing the action to “fail” in those cases.
Step 4: Create the Goal
Create a goal, and tie it to your event.
Under “Admin”->”View” you will see a link to your existing “Goals”. Click on the link, and then click the “New Goal” button.

Give the Goal a name, and pick “Event” for the “Type”. You can leave the Goal Slot ID as whatever default it gives you.

On the “Goal details” panel we need to set up the goal to watch for goal details which will match the event we have created in Step 3.
We use the “Category”, “Action”, and “Label” values from our event beacon. Get as specific as possible with these definitions so that you don’t catch additional events and trigger the goal. Click “Save” and your goal will be set.

Step 5: Test!
It might take a few days for your Event and Goal dashboards to populate with existing data, but you can run a test to make sure your Events are firing and your Goals are triggering.
Open to the Realtime Events panel in your Google Analytics dashboard. In another tab, pretend you are a user, and perform the action you want to track. If you see an event blip come through, you are on the right track!


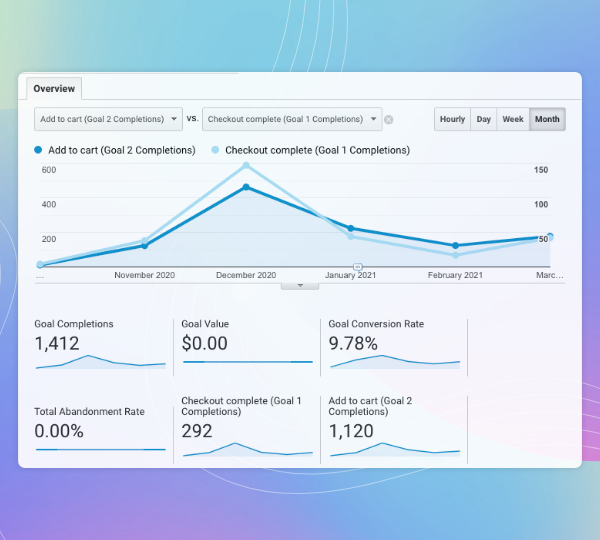
The next step is to go to the “Conversions->Goals->Overview” dashboard, change the date range to “today” and make sure you see a few conversion blips.

Now, you have a way to see in real time all the conversions taking place on your website!
Events and Conversions in GA4
As of 2022, documentation around GA4 events, and how to trigger this is sparse and confusing. If you plan to keep using Google Analytics, despite the complete and total loss of historical data, here are some tips for getting your events created in GA3/Universal Analytics to show up in GA4.
The good news is you shouldn’t need to update your event trigging code at all. After adding your GA4 tag to your analytics setup code, any events triggered with the “gtag” javascript call will go to both GA3 and GA4. Note that according to our testing the GA4 config line must go after the UA line or else events will only go to GA4.
<script>
window.dataLayer = window.dataLayer || [];
function gtag(){dataLayer.push(arguments);}
  gtag('js', new Date());
  gtag('config', 'UA-xxxxxx-x'); //ua/ga3
  gtag('config', 'G-xxxxxxxxx'); //ga4
</script>
Now the custom event triggering javascript call, will not need to change.
function log_event(category, action, label) {
  if(gtag) {
    gtag('event',action,{'event_category':category,'event_label':label});
  }
}
However, in the new GA4 interface, you will still need to create a custom event definition to have the events show up at all, as well as mark which events you want to track as conversions. Within the GA4 dashboard you can go to “Configure->Events” to see your list of events:

In order for your custom events to show up you need to click “Create Event.” In GA4, when you pass event_label, and event_category, those fields show up as “parameters” on the event. So when we updated to GA4, we created a “contact_form_submission” event (event names cannot have spaces or dashes, add that to list of GA4 quirks), and put in “event_category=form”, and “event_label=contact-form”. If you are wondering if you can use “event_action” as a parameter, the answer is no. However, the value passed as “action” in your event triggering code will be available as the value of the “event_name” parameter.

Now you need to trigger the form submission, so that this custom event will show up in your list of Existing Events. Only then you can mark it as a conversion with the little on/off switch in the right column.

Note that, if you want to edit your event, do not click “Modify event”, click “Create event”, which lets you modify created events. Clicking Modify Event lets you modify event parameters on events that come in. Please don’t ask us why or when this would be necessary, why this confusing button label came to be, or why editing an event isn’t available in the hidden row action menu which is only shown on hovering, we are just as confused by GA4as anyone else.

If you are using Google Tag Manager for your custom events, check out this guide for GA4 details.
Follow along on our journey to try to decipher GA4 and mourn the loss of decades of historical data that will be lost forever.